

or how to build multiple products with a single team.
Suppose, you have a mobile app you’re working on. Suppose you need to publish a very similiar application with slight modifications for, as an example, a new customer. A good example of the situation is a branded antivirus solution. And one of the non-functional requirements is a necessity to support it with the same project team. How would you do it? The options are the following:
- Separate code bases without shareable modules
- Separate code bases with reusable modules
- Single codebase
I came up with the following comparison:
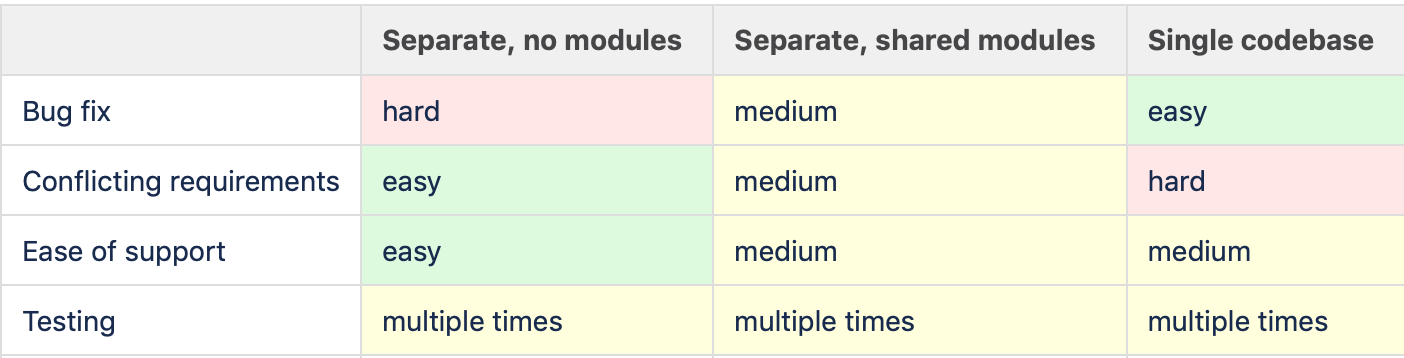
With one code base you will definitely save on propagating your bugfixes to other products. And what’s more important, if your change the very core of your app it will be automatically mean that all the applications built on that code base have that new core(for example, if you’re using new navigation system). However the risk of single code base is that one of the products will have a requirement which conflicts with some other features. Then you will be doomed to make the fork in that particular moment. But the longer you can postpone that moment, the more benefit you would have.
The question of this article however is too provide the guide on how to implement the one code base approach for both Android and iOS platforms.
Let’s figure out what we need to configure.
- Application id
- api host
- Labels, colors, fonts, splash screen, app icons
- Feature set
Android
Android already provides a great mechanism for building several apps from a single code bases with gradle and flavors. There is a great guide on them here, we’re going to see how to use it properly.
Application id
To configure application id we need to provide the values in our product flavors:

If the base of your application id is common you can use applicationIdSuffix instead of applicationId.
If you’re using Google Play Services(which you extremely likely to do) then you will need to provide different google-services.json files for your apps and application ids as well. With the latest gradle(> 4.4) and google play services gradle plugin, it’s really easy. Just put the files into the appropriate source folders:
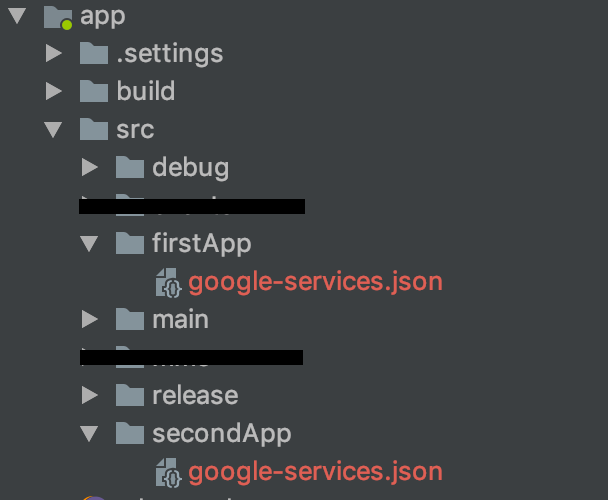
Of course, you can add the underlying folders for any of your buildtypes(debug, release, whatever else). The google services plugin will grab those files automatically. The important caveat is that you need to provide the file for each of your flavors. Otherwise the plugin will report that the configuration task can not be completed.
Api Host
You will have to connect to different api hosts in your applications and within each application to different envs: staging, qa, dev, production, etc.
The good news you may use BuildConfig field generation right from the get-go:

Labels, colors and other resources
Source directories help us out again. Just place the proper resources in the flavor folders.
Feature set
This one can be tricky. You basically have several options:
- Just obtain the feature set from your server and don’t forget to cache it for reasonable amount of time(15 minutes is ok). This requires some work on server side but once you have the proper instruments set the configuring the feature set becomes as easy as clicking checkboxes.
- Have a configuration file(like json or yaml) in a flavor assets folder.
- Chances are the both approaches are required since you may have free/upgraded/premium users for some of your apps so you ship one feature set for the application, and then disable/enable them according to the user status.
iOS
iOS has the targets mechanism which provide all the flexibility you will require. A great article already exists here, but let’s take a close look anyway.
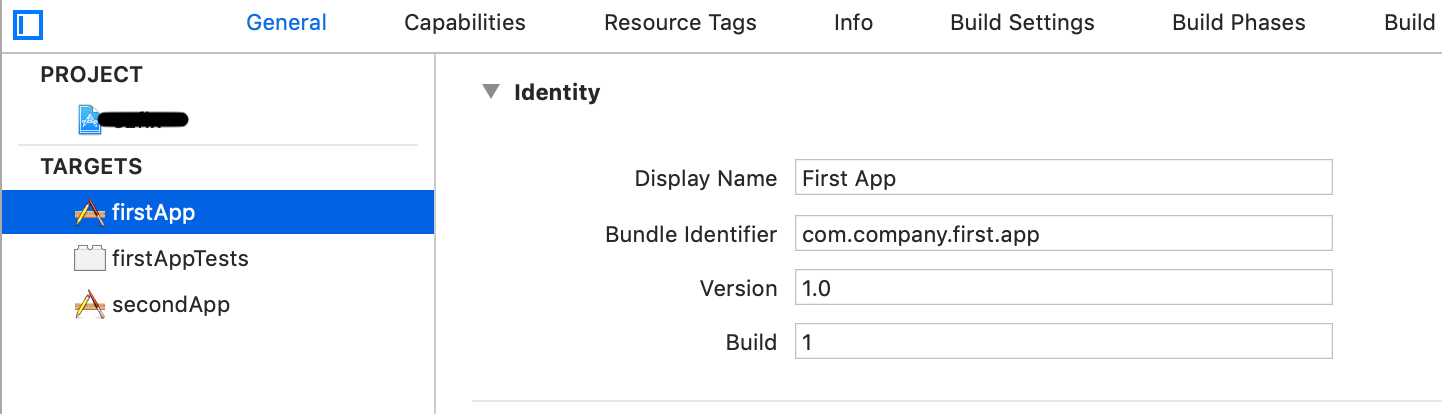
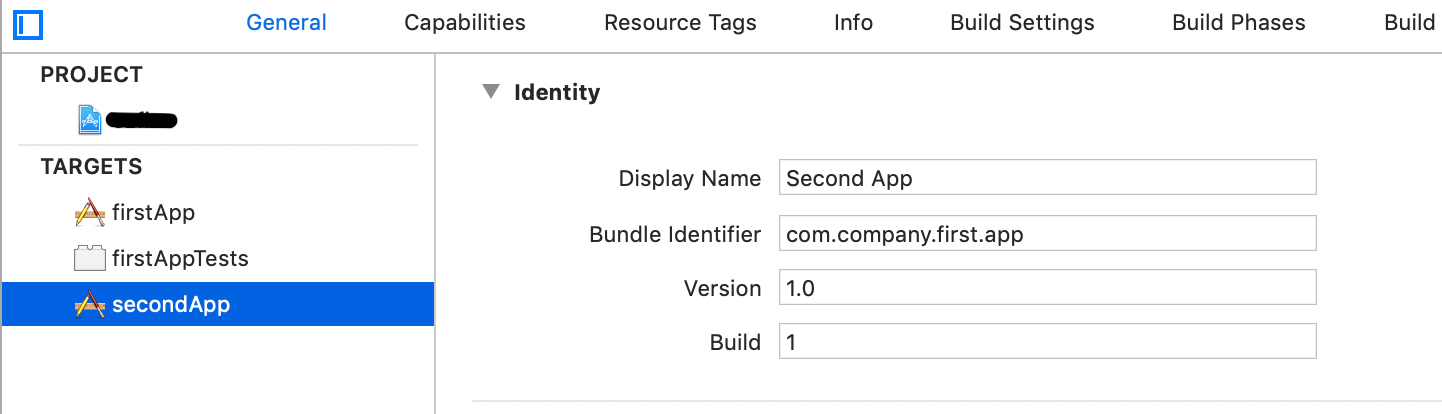
Application id
Once you create a new target you obtain a new Info.plist file for it, which allows you to set the name, version, bundle id(and much more).
Labels, colors and other resources
The main headache is brought by fonts, as you don’t want to bring all the fonts for all your application in each .ipa. So, you can simply exclude the uncessary fonts by unticking the particular one for the targets:

API Host
For each target just add the flag in the build settings, like this:
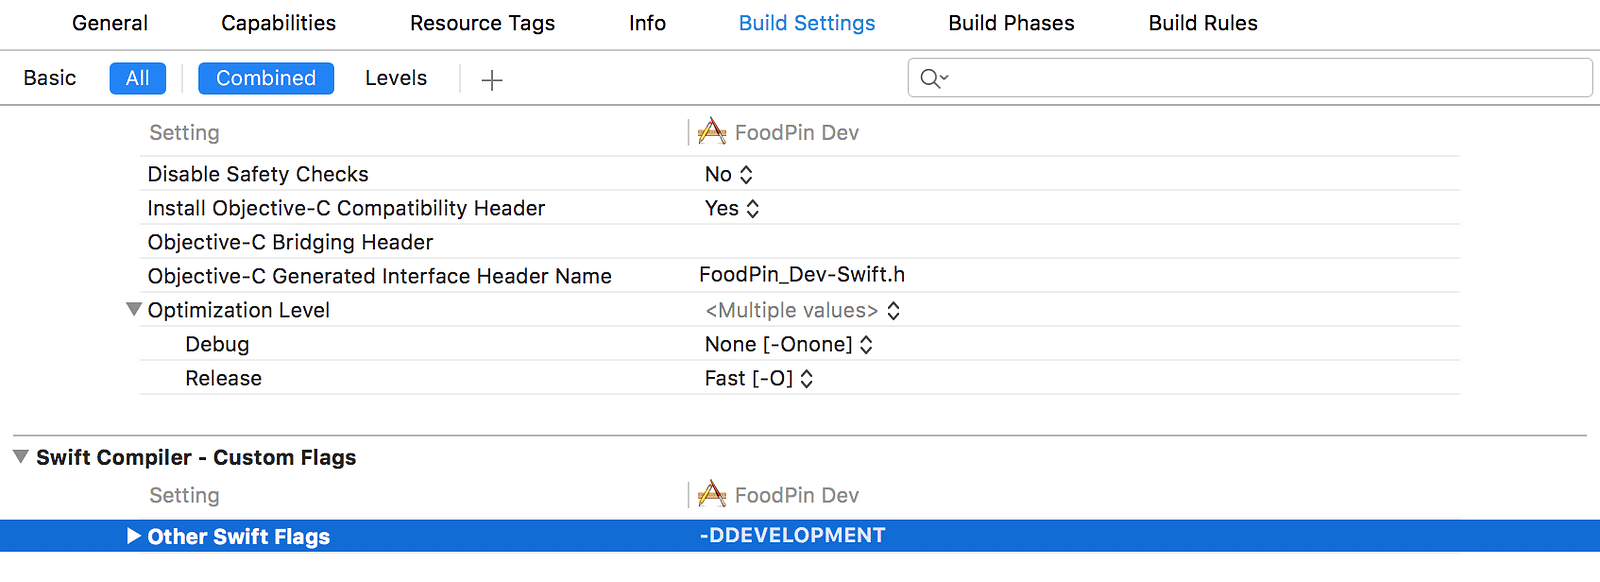

Or just add the host value straight into your Build Settings!
Feature set
I believe the approach here is the same as for Android with only difference that you will need to point out the name of feature set somewhere in the build scheme, for example with build settings again.
React Native
The most interesting part :)
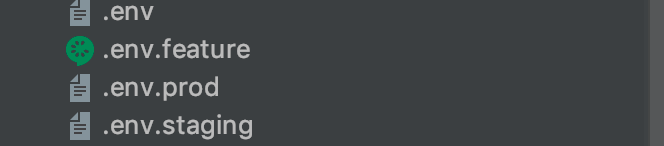
There is already a plugin named react-native-config which provides a lot of configuration for you. Your goal is to split the configurable variables into separate files:
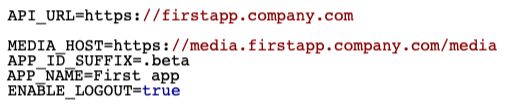
There you can set API_HOST, app name, app id suffix and many more:
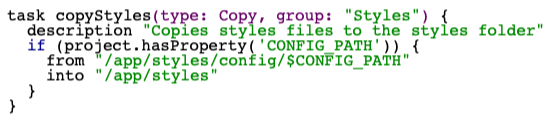
Also you would want to choose which set of js resources to choose for your app. You can have the same folder structures for resource and pick one folder at buildtime:
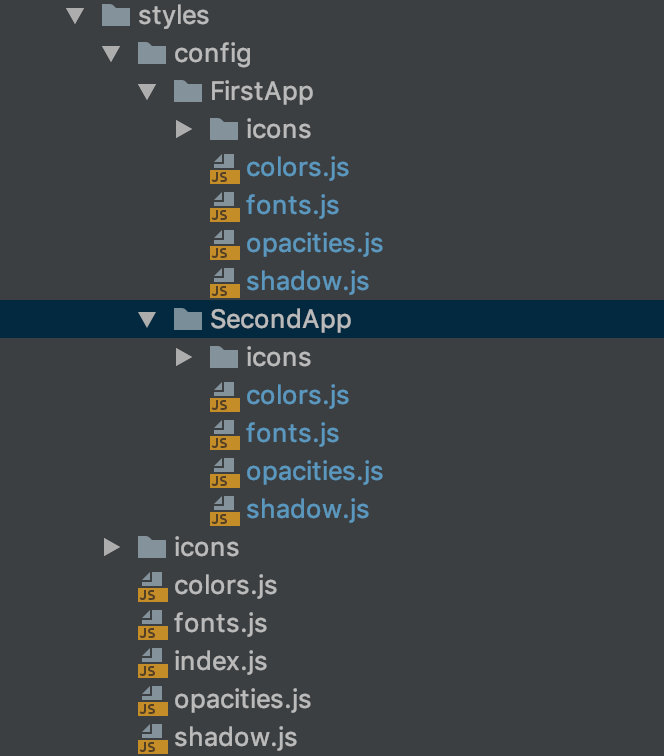
You can import from different locations right from your files or important from a single one, but copy it from the necessary folder, for example with Gradle:
And that’s it!
Don’t forget to follow me on Twitter in order to stay tuned and please, stay well.