

Photo by Ferenc Almasi on Unsplash
React-Native is a cross-platform technology for creating mobile applications. Despite many people thinking it's main advantage is using a single codebase for 2 apps it's not the most valuable thing of RN. The main advantage is usage of React with all it's benefits including the wide community of web developers.
It's perfectly logical for React folks to start building mobile apps with React-Native already having a solid experience in React. However, mobile world is much different from the web. Today I want to share what you have to keep in mind when diving into Mobile.
1. Screen Densities
The CSS assumes you're working with a pixel as a unit of physical measurment being equal to 1/96th of an inch. If you are building websites for desktops only it's perfectly fine, but the mobile devices have different screen densities and you need to account for it. That's why you need to have different margins, paddings for different devices and have different assets(i.e. images) for them as well. There is a good article explaining the mobile approach here. Also, you can reach out right to the Android Developer resource for supporting different screens.
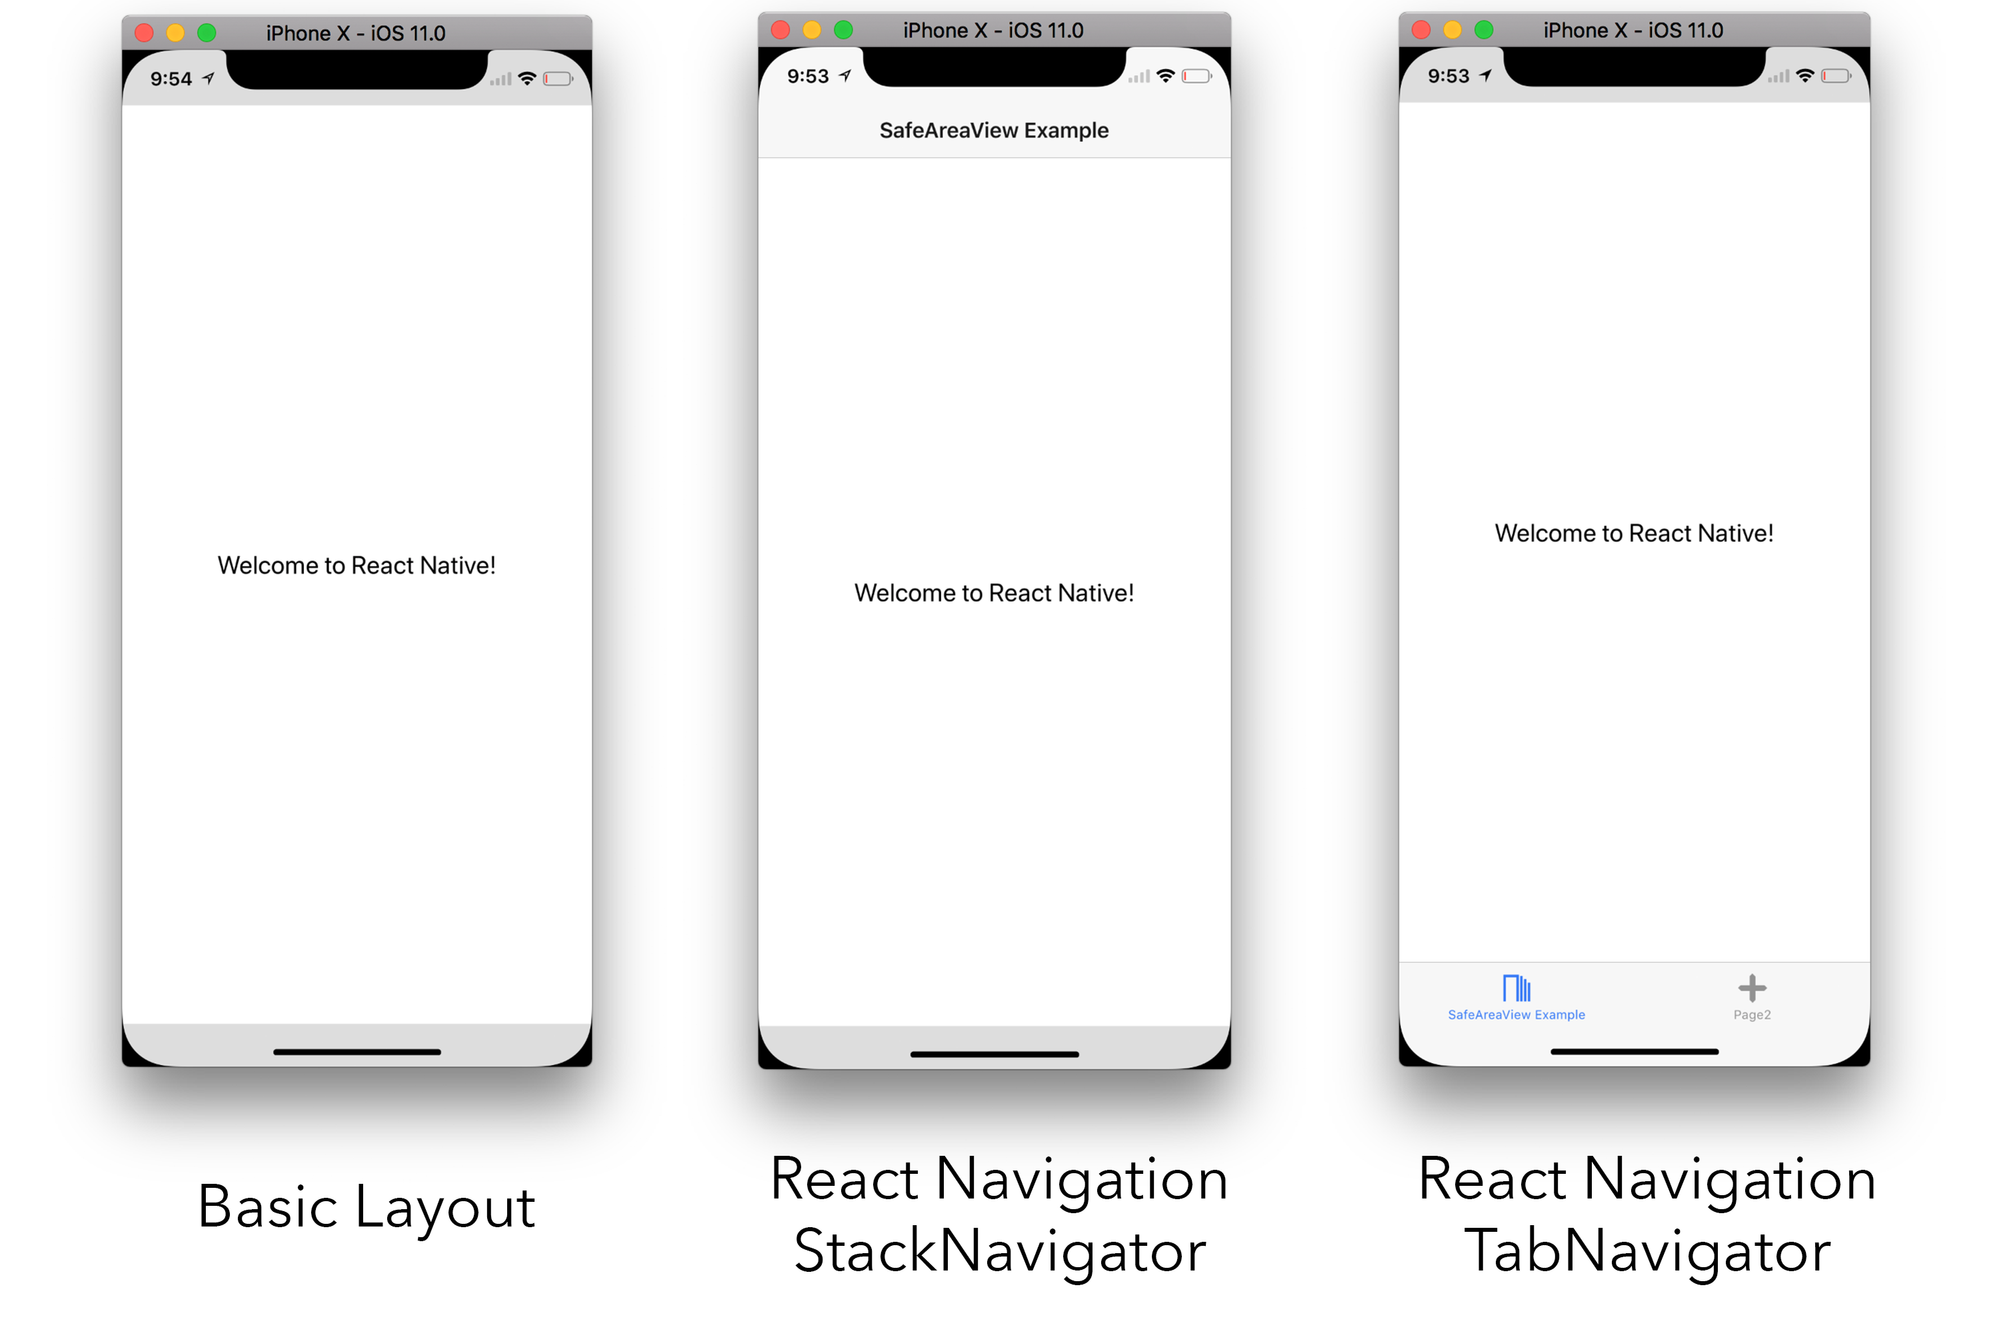
2. Navigation
In a browser we have a current page, a back button for history and anchors. In Mobile we have screens instead and the navigation between them follows several well understood patterns like tab navigation, stack navigation and back stack. It's pretty straight-forward you can't use react-router, but you can use a recommended react-navigation library instead for having tailored mobile navigation experience.

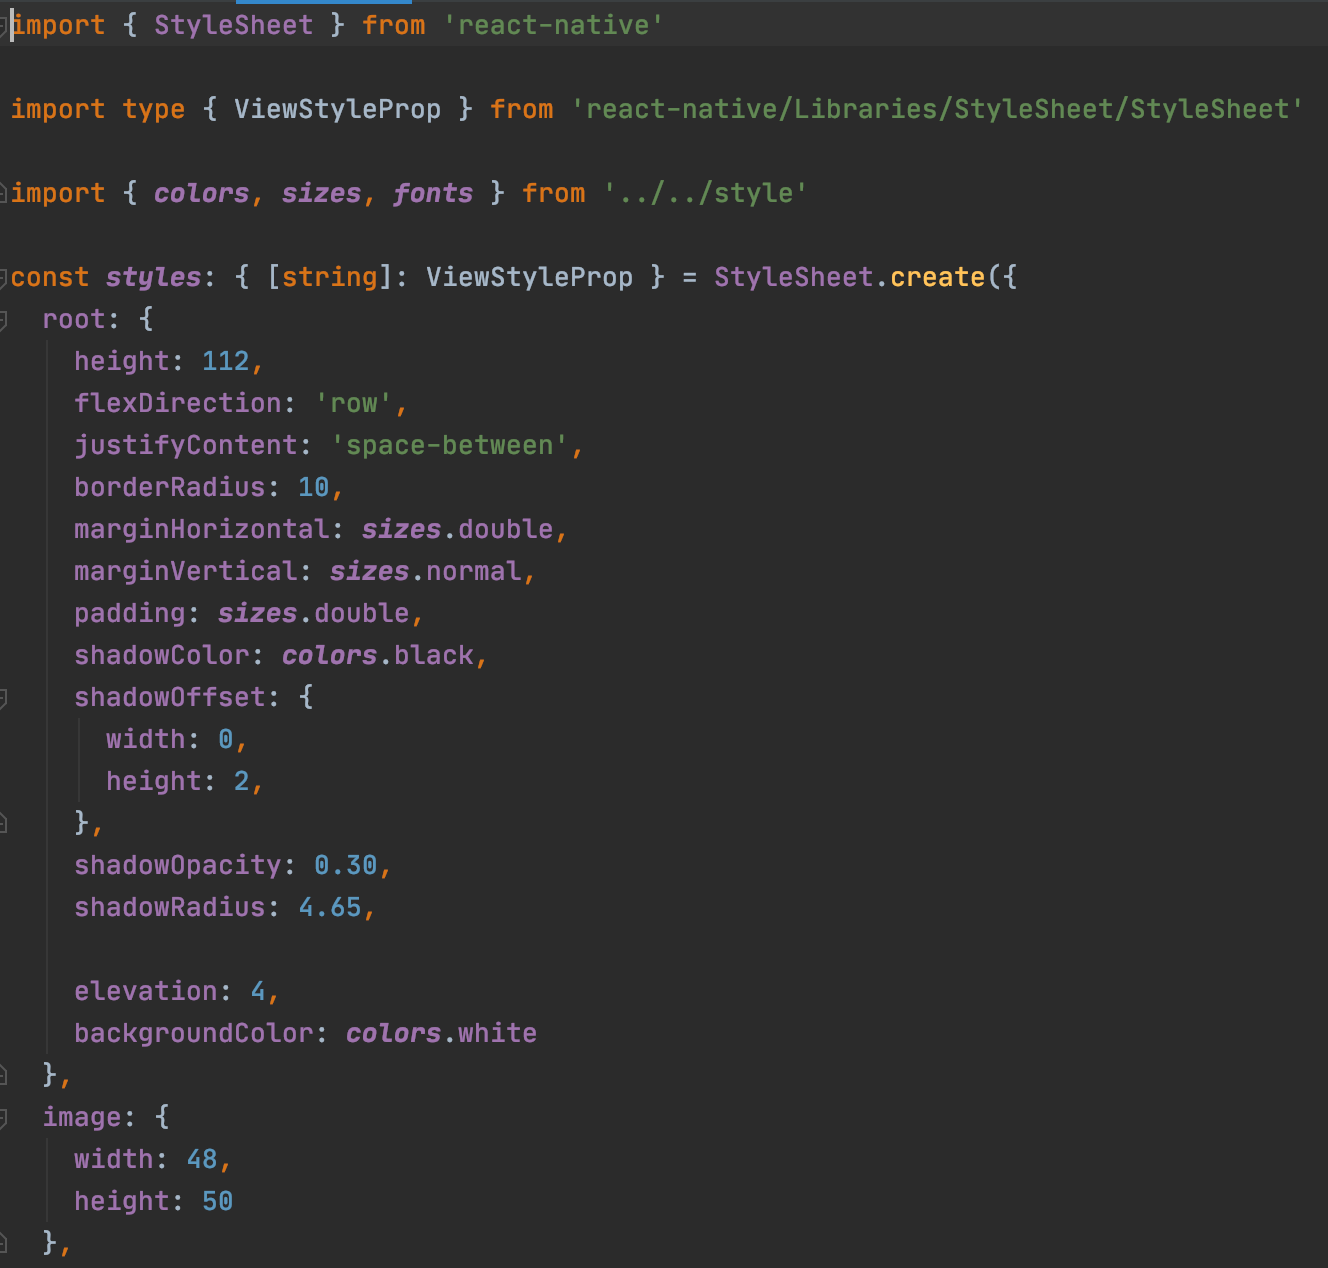
3. Styles
You can't apply the CSS here and none of the solutions working with it functional here. You can use neither CSS-in-JS, nor LESS, nor anything else. Instead you use JSON objects to define styles for your components. The important notes here:
- always use StyleSheet.create({}) so React-Native can cache the styles
- Flexbox is still here, just the naming is a bit off.
4. Network
If you're building a website or a desktop app using React(say with Electron) you may assume rather safely that your internet connection is good and stable enough. We are talking about mobile devices now, so your connection may be surprisingly slow, flaky or absent at all. You need to design your app for that, starting with the prompts about the connection and including the offline strategies like caching. The connection can also break in the middle of a network operation, so be ready for it.

5. Signing
In the opposite of the website which you can just deploy to an S3 compatible storage, your application must be digitally signed so that the user handset can verify it is the app distributed exactly by yourself. This process can be really cumbersome especially for iOS, where you have to purchase a developer program, create an app id, a profile, generate and export a signing certificate, ughh. The Android platform has it easier: you can generate all the required stuff with a single command line or with the help of Android Studio and distribute the app right away.
6. Distribution
Again: you can't just upload the content to a S3 or VM. You have to go through either Google Play and App Store, or distribute your app outside the official store. This may be a perfectly valid case for enterprise distribution when your app is not targeted outside of your company. In such case App Store just won't let you to publish in the App Store in the first place, so you have to rely on some MDM solution or just distribution through MS App Center, Firebase Distribution etc.
Aside of that, the stores enforce a lot of rules to be abided to. These include the icons, graphic materials, UI guidelines, permissions, security and many more.
7. Tools
You may continue to use VSCode or WebStore or even Vim for code editing and Chrome as a debugger, however, chances are you can leverage Xcode and Android Studio to have some additional benefits like logs, monitoring tools, editing project files and other stuff. You will also would like to try Flipper, Reactotron and other tools for better React-Native developer experience.
8. Emulators, Simulators and Devices
For Web development you need only a bunch of browsers. For mobile development you will require to run your code on some sort of a mobile device: you can use your own but I doubt you have both Android and iOS devices next to you. The good news you can use Android Emulators(which you can download and run from Android Studio) or iOS Simulators spawned from Xcode, if you work on a Mac(no, you can't have iOS Simulators on any other hardware, at least legally). This is a whole new experience, but definitely a fun one.
9. Native Code Linking
Your js code stays with you, however it will communicate with native(Kotlin, Swift) code as well. The application should be correctly linked with it in order to work properly or at least not crash. The good news is that starting React-Native 0.60 the linking is happening automatically for the huge amount of external libraries.

10. Code Reuse
Great news, finally! If you're building both Web and Mobile application you can leverage some of the code reuse. You definitely can reuse all the domain and network code as there is close to 0 of web or mobile specific. Chances are you can reuse business logic as well, but it's far less likely.
In the future articles we are going to dive deep into each topic in particular, so be sure to subscribe here, it's free!